Creating a New Module
Modules in Kuwaiba help structure and organize various aspects of the system, facilitating the management of a wide range of resources and functionalities. They adapt to the changing requirements of the business and technological environment. Additionally, you can model any aspect relevant to everyday life.
Create a Module
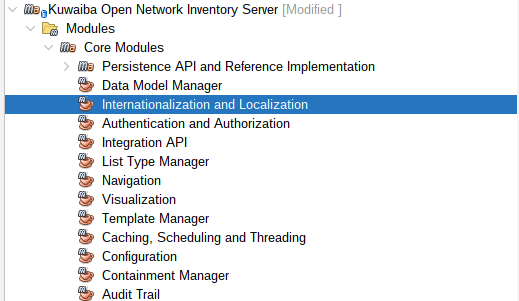
Kuwaiba Modules
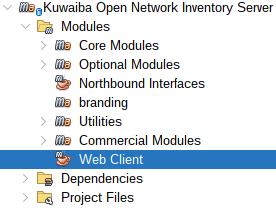
Application modules are located in the Modules folder of the main application.
Kuwaiba handles 3 types of modules:
- Core Modules: Main modules of the application.
- Optional Modules: These are additional modules specific for telecommunications management that are not essential for the basic operation of Kuwaiba. Although Kuwaiba can operate without these modules, they can be useful for users who need telecommunication-related functionalities.
- Commercial Modules: Modules designed to be licensed commercially and that will not be open source, providing functions for more specific telecommunications technologies.
In the Modules folder you can create your own module:
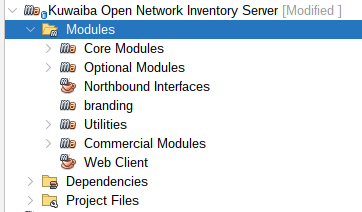 |
|---|
| Figure 1: Kuwaiba Modules |
Create a Java application with Maven and name it as you prefer (In this example, it was named RentHouse):
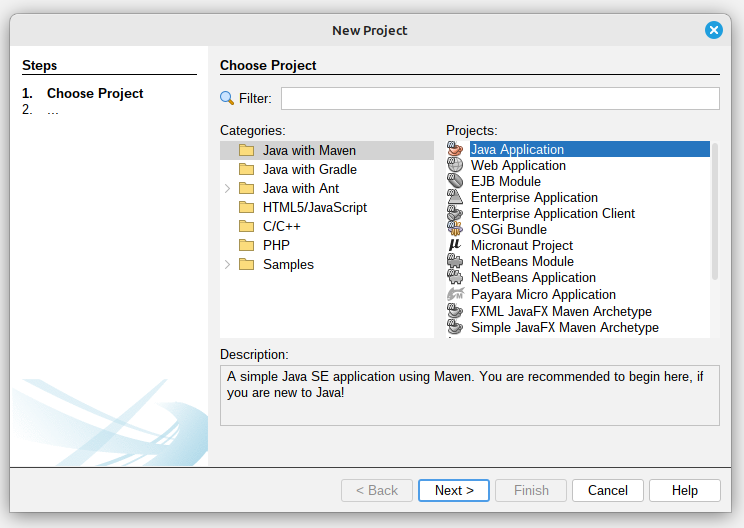 |
|---|
| Figure 2: Creating a New Project |
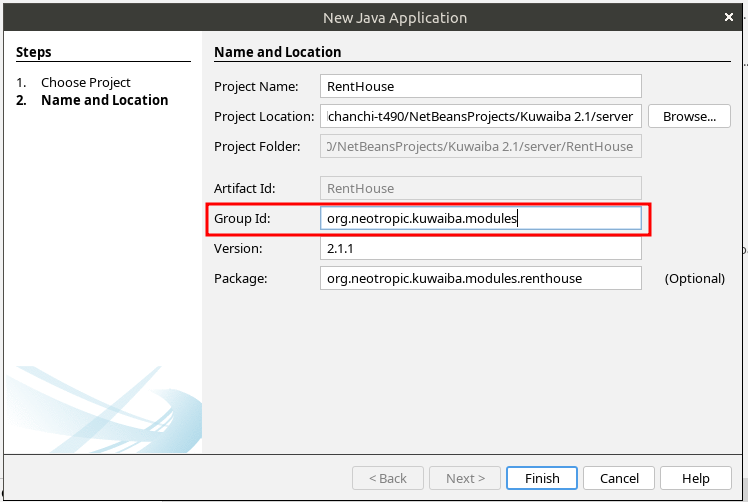 |
|---|
| Figure 3: Add the Group Id |
Your Project:
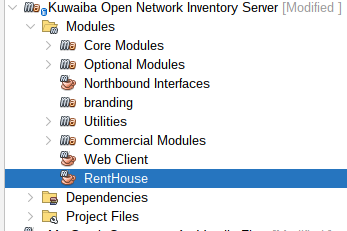 |
|---|
| Figure 4: Module Created |
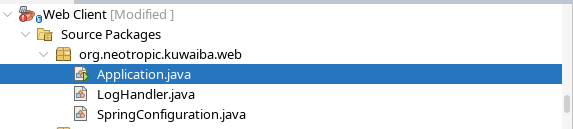
Web Client
In the main Kuwaiba application, we also have the Web Client, which serves as the entry point for the entire project.
Open the Web Client Application in the Main Kuwaiba Application:
 |
|---|
| Figure 5: Web Client |
Right-click on Dependencies and then click on Add Dependency:
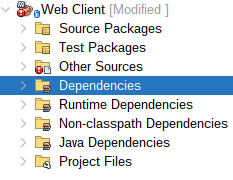 |
|---|
| Figure 6: Web Client Dependencies folder |
Select your project and add it to dependencies:
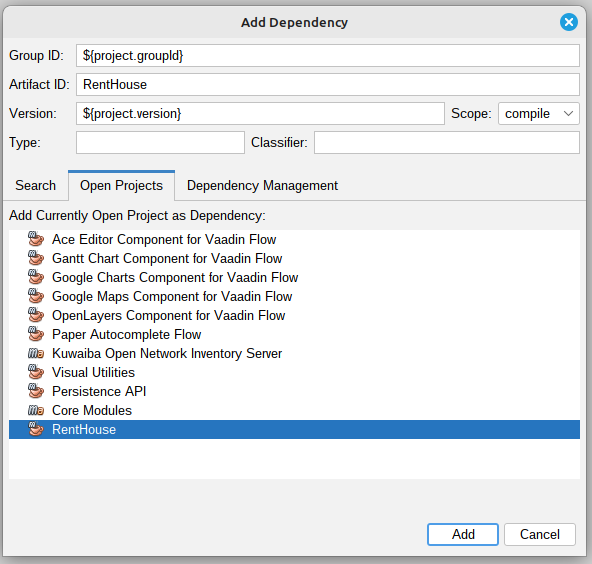 |
|---|
| Figure 7: Web Client Dependency Added |
Note
You can also add the dependency directly by editing the pom.xml file.
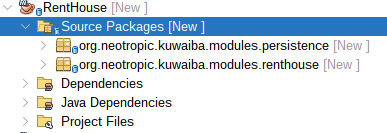
Module Structure:
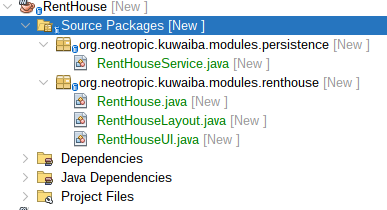
Create the following Packages within the Source Packages of your Module:
- persistence.
- (
Your module name), for this example renthouse.
Note
Verify that your Packages follow this structure:
org.neotropic.kuwaiba.modules.YOUR_PACKAGE
 |
|---|
| Figure 8: Rent House Packages Structure |
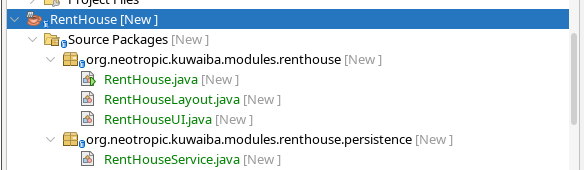
Create the following Classes within the previously created Packages:
 |
|---|
| Figure 9: Classes of each Package |
- persistence
RentHouseService: The RentHouseService class is a Spring service component to facilitate interaction with inventory objects.
- renthouse
RentHouse: The RentHouse class is a Spring component to define a specific module within the Kuwaiba application.RentHouseLayout: This class is designed to define the layout structure for the Rent House module.RentHouseUI: The RentHouseUI class is a Vaadin UI component designed to provide the user interface for the Rent House module.
Later, we will write the code that should go into each class.
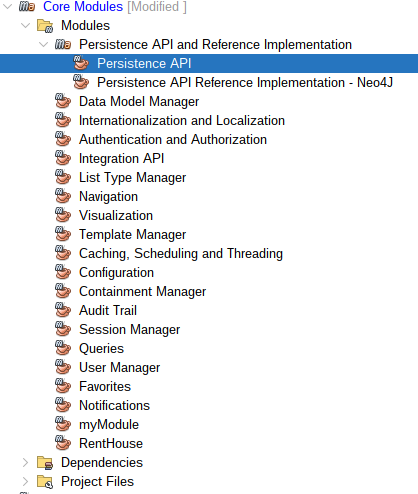
Persistence API
Contains the definition of the classes and interfaces necessary for communication with the database. For this purpose, Kuwaiba uses the Persistence API, which allows you to manage data in the database.
Open the Persistence API Application in the Core Modules of the Main Kuwaiba Application:
 |
|---|
| Figure 10: Persistence API |
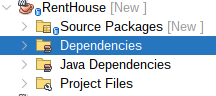
Add Persistence API to your module dependencies, right-click on Dependencies and then click on Add Dependency:
 |
|---|
| Figure 11: RentHouse Dependencies folder |
Select Persistence API and add it to dependencies of your Module:
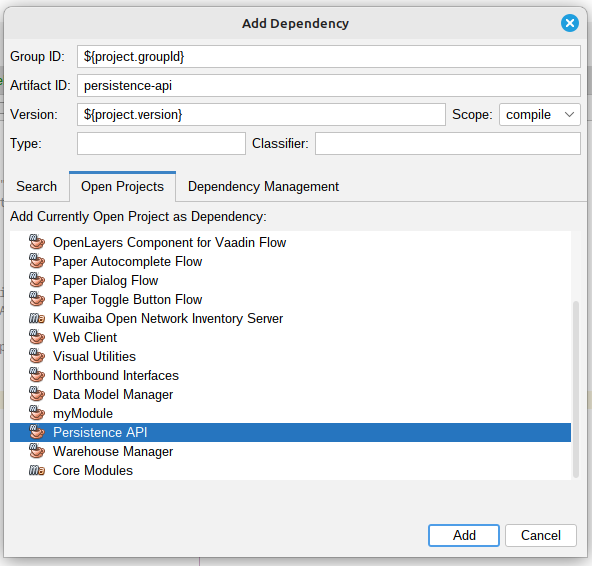 |
|---|
| Figure 12: Persistence API Dependency Added |
Note
You can also add the dependency directly by editing the pom.xml file.
Consume the Kuwaiba service:
BusinessObject and BusinessObjectLight
Since Kuwaiba's data model is dynamic, the system allows you to create any object you need to manage your inventory, providing high flexibility and customization in its administration.
In Kuwaiba there are two types of Classes to create inventory objects:
BusinessObject: It's a class that is used to map the inventory objects.BusinessObjectLight: It's the super class of Business Object.
BusinessObjectLight allows you to manage objects with the essential attributes of an entity in the database, such as id, name, and className. On the other hand, BusinessObject also includes these basic attributes and allows you to create objects with additional attributes, such as the creation date.
For the implementation of the example, we will use BusinessObjectLight to display the houses registered in the inventory, along with their basic attributes: id, name, and className. But first, we must understand some other concepts, which will be explained later.
Entity Manager Interfaces
They are interfaces that define fundamental operations and interactions with different aspects of the system. In Kuwaiba, there are three types of Entity Managers, each serving a distinct purpose:
MetadataEntityManager:Responsible for data model manipulation.BusinessEntityManager: Used to manipulate inventory objects, including adding, removing, updating, and retrieving items from the inventory.ApplicationEntityManager:Responsible for everything related to the application, such as user management and session handling.
Internationalization and Localization Module
It's used to manage and adapt the content of Kuwaiba to different languages and regions.
 |
|---|
| Figure 13: Internationalization and Localization Module |
Modify messages_en_US.properties and messages_es_CO.properties files:
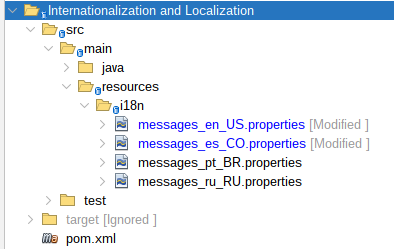 |
|---|
| Figure 14: Internationalization and Localization Module Structure |
Add the following content in the messages_en_US.properties file:
    module.rent.house.name=Rent House Module
    module.rent.house.description=Rent House Module description...
    module.rent.house.title=Rent House :: Kuwaiba Open Network Inventory
Add the following content in the messages_es_CO.properties file:
    module.rent.house.name=Renta de casas
    module.rent.house.description=Renta de casas descripcion...
    module.rent.house.title=Renta de casas :: Kuwaiba Open Network Inventory
Translation Service
This interface provides translation services.
    @Autowired
    private TranslationService ts;
Use the Translation Service:
    public String getTranslation() {
        //Use the key from the internationalization file that you added
        return ts.getTranslatedString("module.rent.house.name");
    }
We will need the steps used in Internationalization and Localization Module and Translation Service later.
Now that we have covered the previous concepts, let's begin writing the code for each class.
First, we will create a module containing the basic code required for our implementation. At this stage, it will only include an empty interface. Next, we will walk through an example that involves the BusinessEntityManager
Insert the following code into your Module Class (RentHouse.java):
    @Component
    public class RentHouse extends AbstractModule{

        public static final String MODULE_ID = "renthouse";

        @Autowired
        private ModuleRegistry moduleRegistry;

        @Autowired
        private TranslationService ts;

        @PostConstruct
        public void init() {
            // Register the module itself
            this.moduleRegistry.registerModule(this);
        }

        @Override
        public String getName() {
            return this.ts.getTranslatedString("module.rent.house.name");
        }

        @Override
        public String getDescription() {
            return this.ts.getTranslatedString("module.rent.house.description");
        }

        @Override
        public String getVersion() {
            return "2.1.1";
        }

        @Override
        public String getVendor() {
            return "Neotropic SAS <contact@neotropic.co>";
        }

        @Override
        public String getId() {
            return MODULE_ID;
        }

        @Override
        public AbstractModule.ModuleType getModuleType() {
            return AbstractModule.ModuleType.TYPE_OPEN_SOURCE;
        }

        @Override
        public int getCategory() {
            return CATEGORY_ADMINISTRATION;
        }
    }
Insert the following code into your Layout Class:
    // Use the basic Kuwaiba layout
    public class RentHouseLayout extends ModuleLayout{ }
Create an empty view inside your UI Class:
    @Route(value = "renthouse", layout = RentHouseLayout.class)
    public class RentHouseUI extends VerticalLayout implements HasDynamicTitle,AbstractUI {

    private final String MODULE_NAME = "RENT HOUSE BY: Neotropic SAS";

    @Autowired
    private TranslationService ts;

    private H3 title;

    public RentHouseUI(){
            super();
            setSizeFull();
    }

    @Override
    public void initContent() {
    createTitle();
    }

    private void createTitle(){
        this.title = new H3(MODULE_NAME);
        add(this.title);
    }

    @Override
    public String getPageTitle() {
        return this.ts.getTranslatedString("module.rent.house.title");
    }
}
Next, right-click on the module and select Clean and Build:
 |
|---|
| Figure 15: Clean and Build your New Module |
Now let's run the application. In the Web Client module, right-click Application.java and select Run File.
Once the application starts, you can access it in your browser at http://localhost:8080.
 |
|---|
| Figure 16: Run Application |
Enable your Module
Go to User Manager:
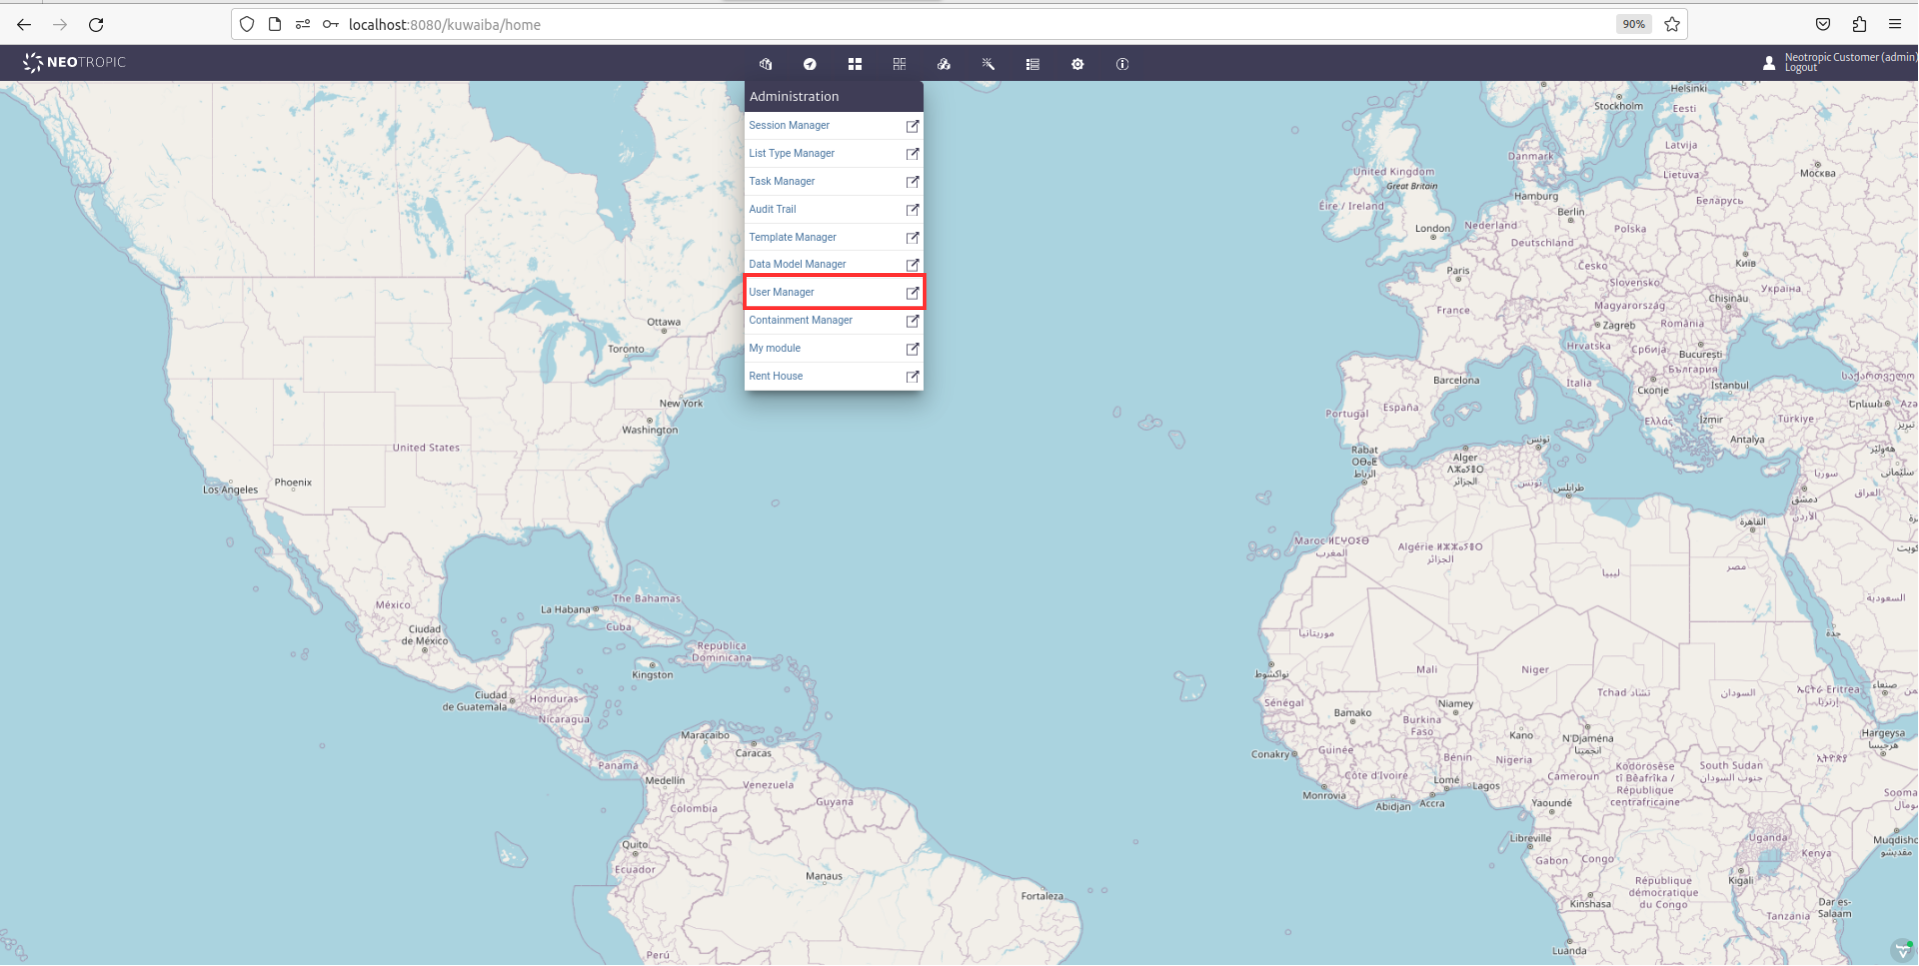 |
|---|
| Figure 17: User Manager |
In the Administrators section, look for and enable your module for the Neotropic Customer (admin):
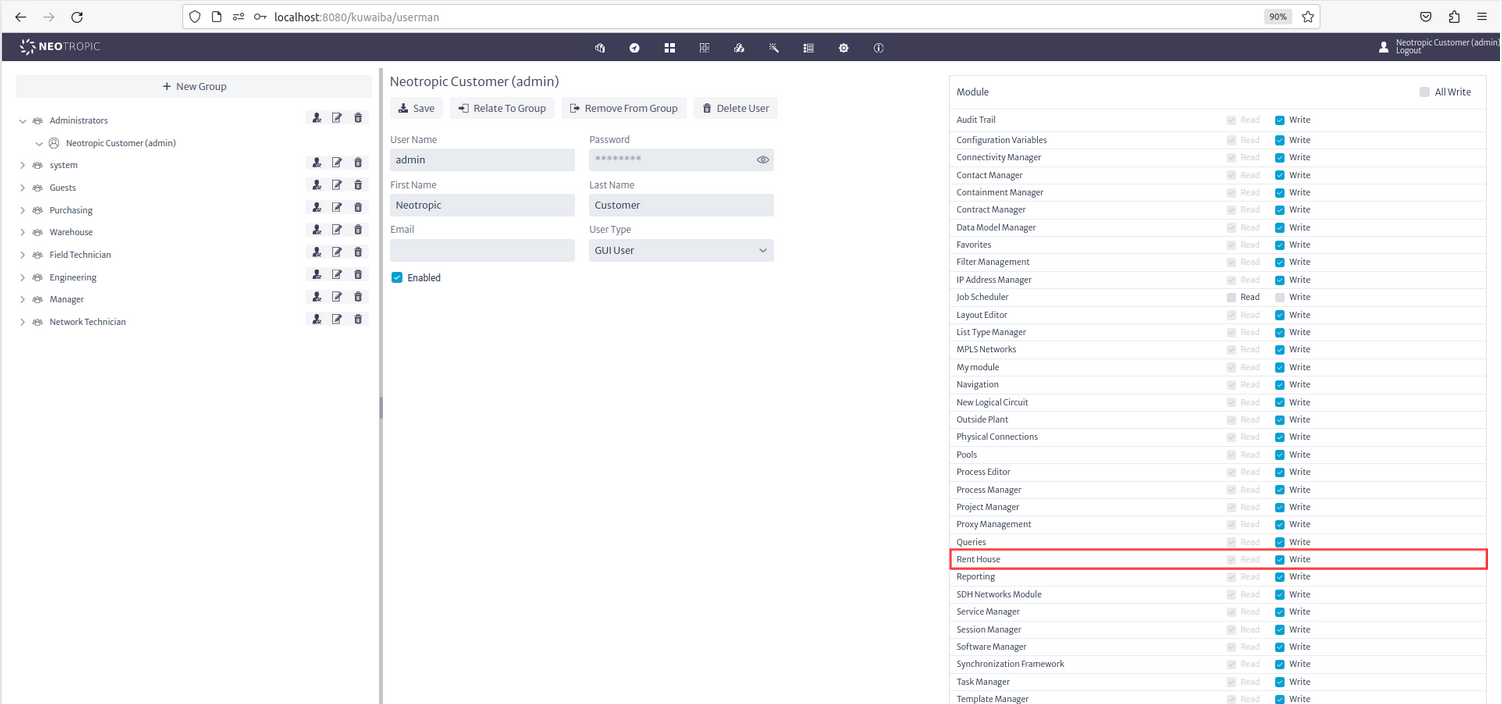 |
|---|
| Figure 18: Enable the Module |
Now you can see you New Module in the Administration section;
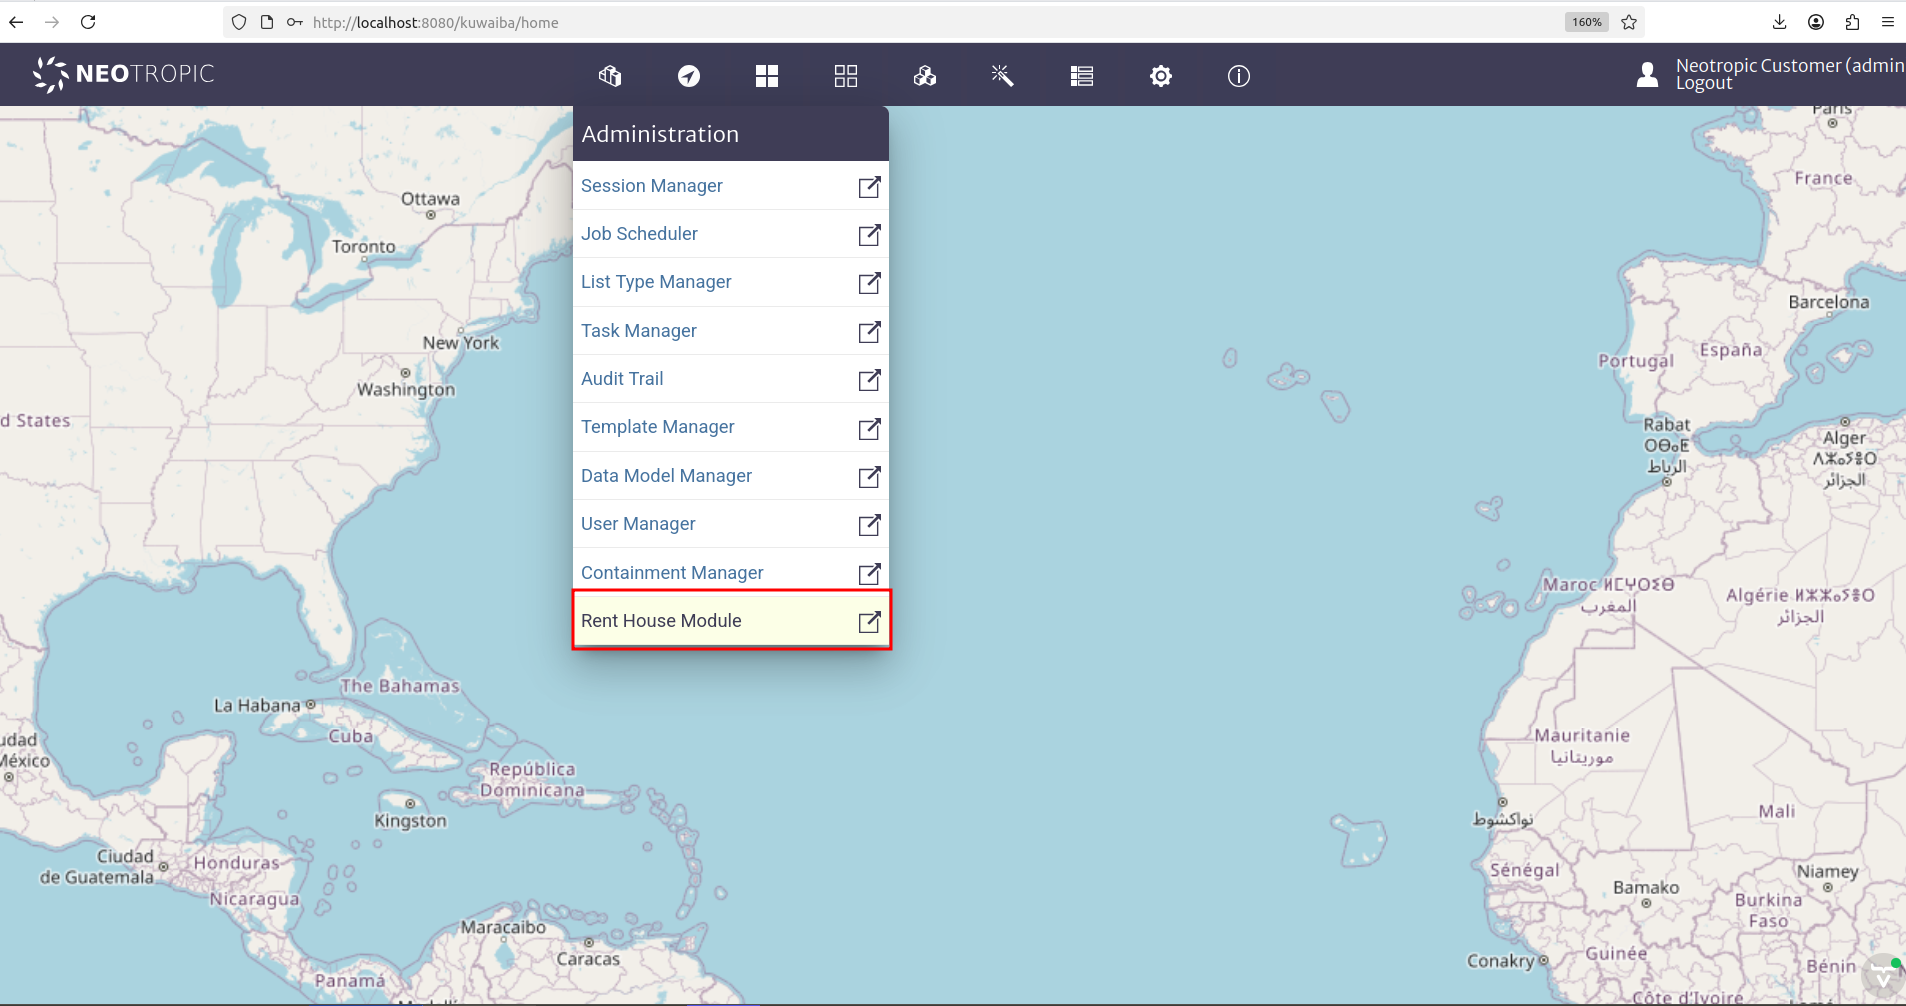 |
|---|
| Figure 19: Rent House Location |
When entering the Rent House module, you will see an empty interface that only includes the title we added in the UI
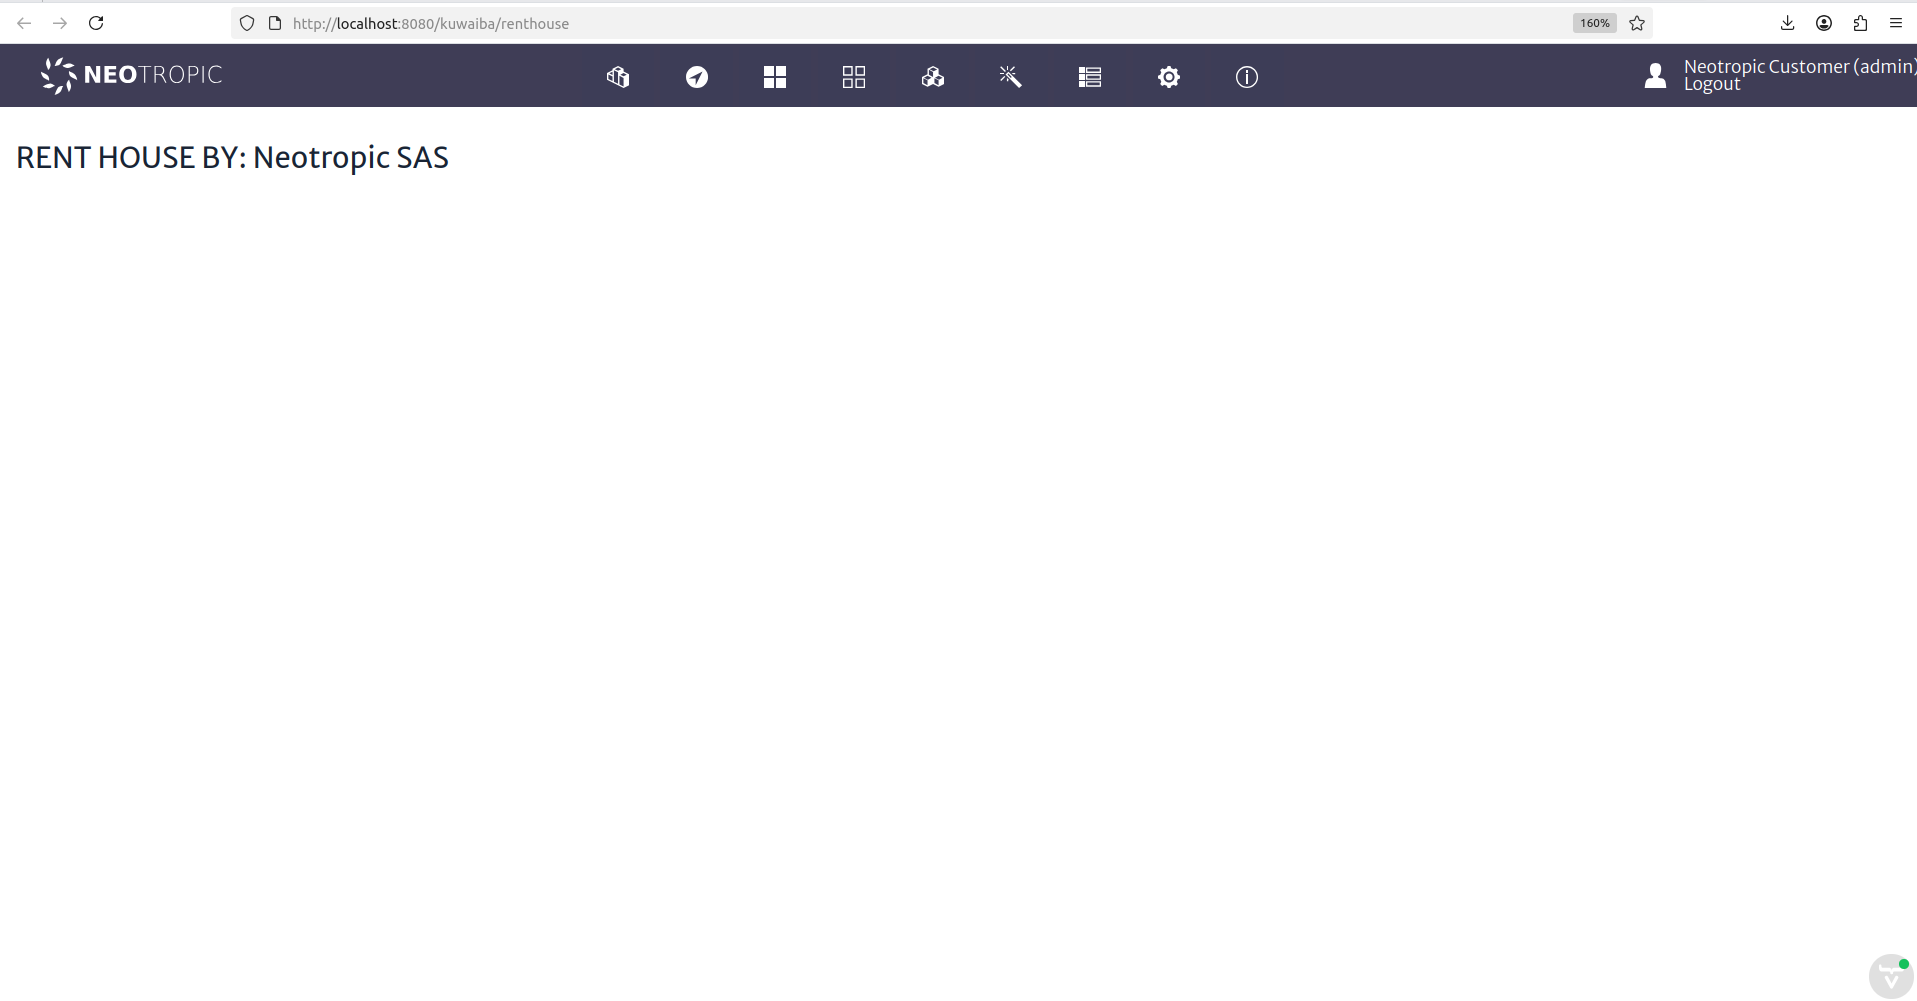 |
|---|
| Figure 20: Empty Rent House Module Interface |
Now we will include the use of BusinessEntityManager in our service class and update the UI in order to retrieve 10 houses from the database and display them in the interface.
Consume the service through BusinessEntityManager interface. Insert the following code into your service Class:
    @Service
    public class RentHouseService {

        @Autowired
        private BusinessEntityManager bem;

        public RentHouseService(){

        }

        public List<BusinessObjectLight> findAllBusinessObjectLight(String className,long page,int maxLimit )
                throws MetadataObjectNotFoundException, InvalidArgumentException{
            List<BusinessObjectLight> listObject = new ArrayList();
            listObject = this.bem.getObjectsOfClassLight(className, page, maxLimit);
            return listObject;
        }
    }
You can access the BusinessEntityManager interface to explore other services that Kuwaiba provides for managing inventory objects.
Create your view inside your UI Class:
    // renthouse is the route of your view
    @Route(value = "renthouse", layout = RentHouseLayout.class)
    public class RentHouseUI extends VerticalLayout implements HasDynamicTitle,AbstractUI{

        private final String MODULE_NAME = "RENT HOUSE BY: Neotropic SAS";

        @Autowired
        private RentHouseService rhs;

        @Autowired
        private TranslationService ts;

        private H3 title;

        private Grid<BusinessObjectLight> gridObjects;

        public RentHouseUI(){
            super();
            setSizeFull();
        }

        @Override
        public void initContent() {
        createTitle();
        createGridObjects();
        }

        private void createTitle(){
            this.title = new H3(MODULE_NAME);
            add(this.title);
        }

        private void createGridObjects(){
            try{
                List<BusinessObjectLight> objects = new ArrayList();

                objects = this.rhs.findAllBusinessObjectLight("House", 1, 10);

                this.gridObjects = new Grid<>(BusinessObjectLight.class, false);

                this.gridObjects.addColumn(BusinessObjectLight::getId).setHeader("ID");
                this.gridObjects.addColumn(BusinessObjectLight::getClassName).setHeader("Class Name");
                this.gridObjects.addColumn(BusinessObjectLight::getName).setHeader("Name");

                this.gridObjects.setItems(objects);

                add(this.gridObjects);

            }catch(InvalidArgumentException | MetadataObjectNotFoundException ex){
                new SimpleNotification(ts.getTranslatedString("module.general.messages.error"), ex.getLocalizedMessage(),
                        AbstractNotification.NotificationType.ERROR, ts).open();
            }
        }

        @Override
        public String getPageTitle() {
            return this.ts.getTranslatedString("module.rent.house.title");
        }
    }
Navigate to your new view:
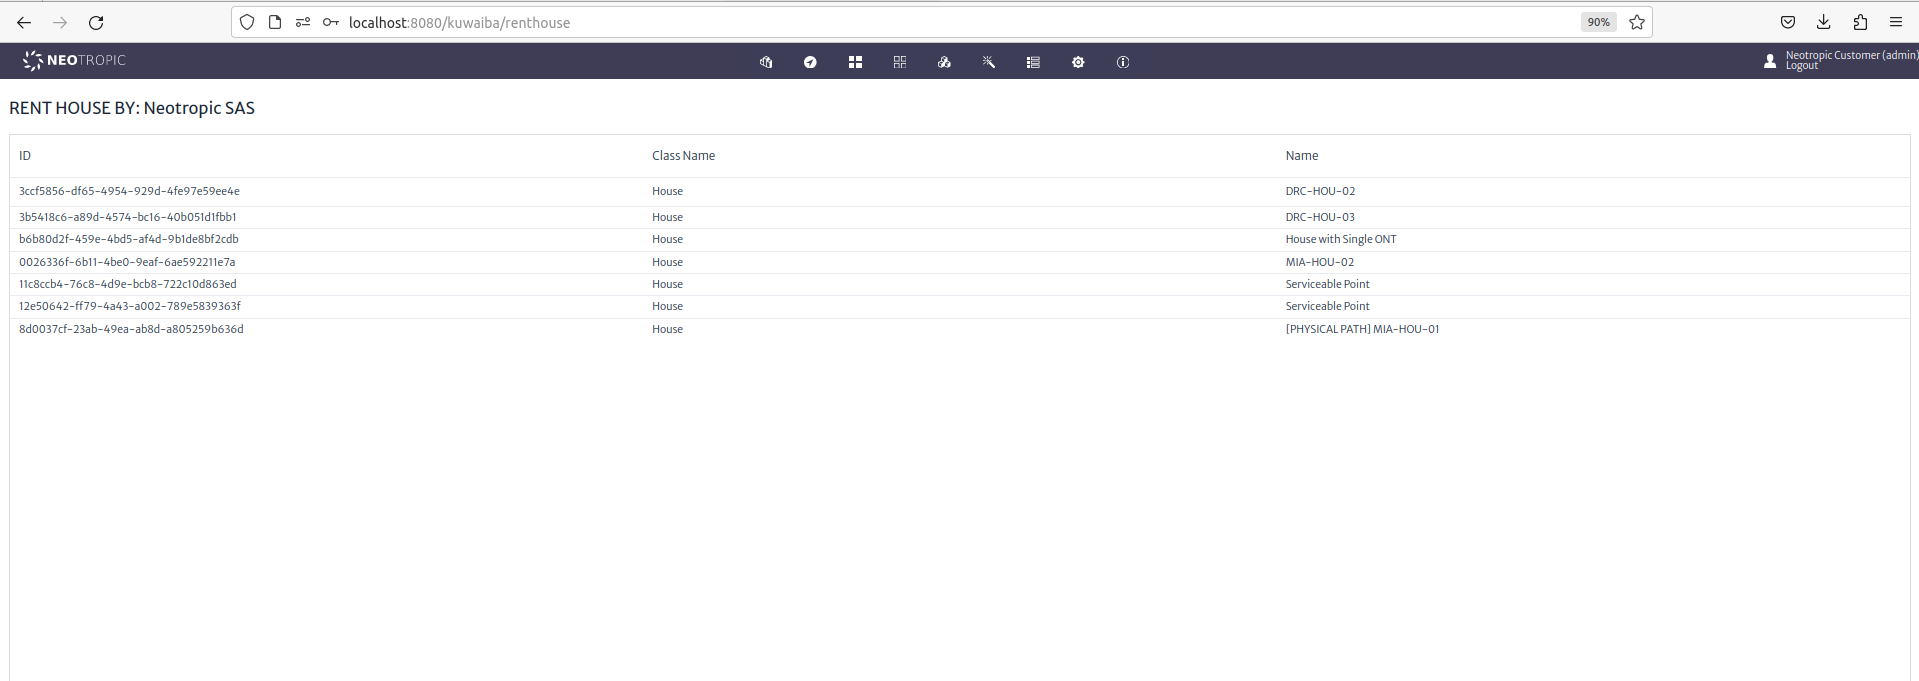 |
|---|
| Figure 21: Rent House View |