Synchronization Framework
The synchronization framework defines the components that allow Kuwaiba to obtain data from the actual network to keep the inventory up to date1.
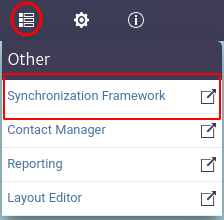
To access the synchronization module, locate the ![]() icon in the menu at the top, when you select it, a vertical menu will be displayed as shown in Figure 1, where you must select the
icon in the menu at the top, when you select it, a vertical menu will be displayed as shown in Figure 1, where you must select the Synchronization Framework option.
 |
|---|
| Figure 1. Access to the synchronization module. |
Figure 2 presents the interface of the module. At the top, there are three options, marked in the red box, which are described below as a series of steps to follow in order to use the module effectively.
 |
|---|
| Figure 2. Synchronization module. |
-
The
Data Source Templatesoption allows the user to view, create or delete templates for loading source data. Selecting this option displays the view seen in Figure 3.
Figure 3. Data Source Templates. To create a template, select the
 icon. When doing so, the information that allows the user to create a new template will appear, as illustrated in Figure 4. In this step, it is necessary to define the template name, description and properties.
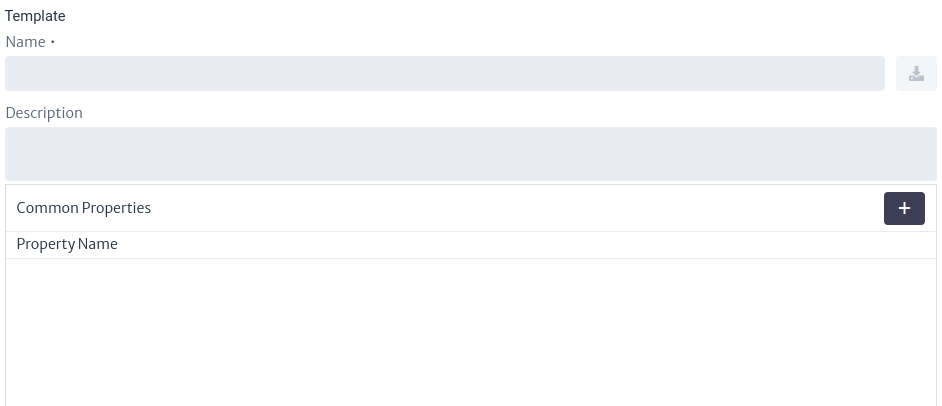
Figure 4. Create template. To add properties, select the icon
. Once the property name is set, press Enter to save the value. To delete a property, click on the icon  next to each added property. Finally, to save the template, select the icon
  .
.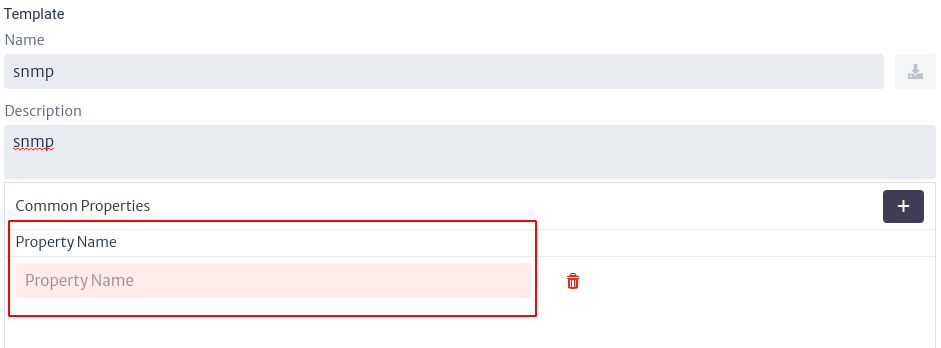
Figure 5. Create properties in template. The templates created are displayed in the list of templates, shown in Figure 3 (initially empty). This list is represented as a table including the name of the template, its description and the associated options. In this context, the only available option is indicated by the icon
, which allows you to delete the template. If you select a template from the list, you can view its contents and modify it, as illustrated in Figure 7.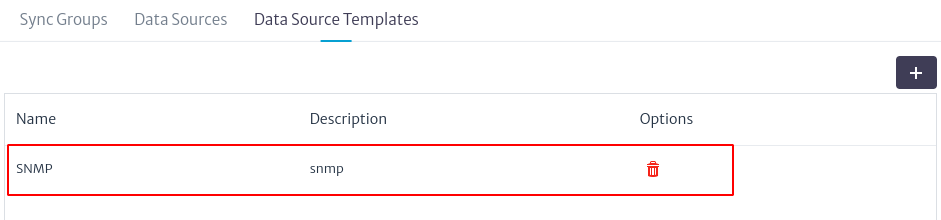
Figure 6. List of templates. 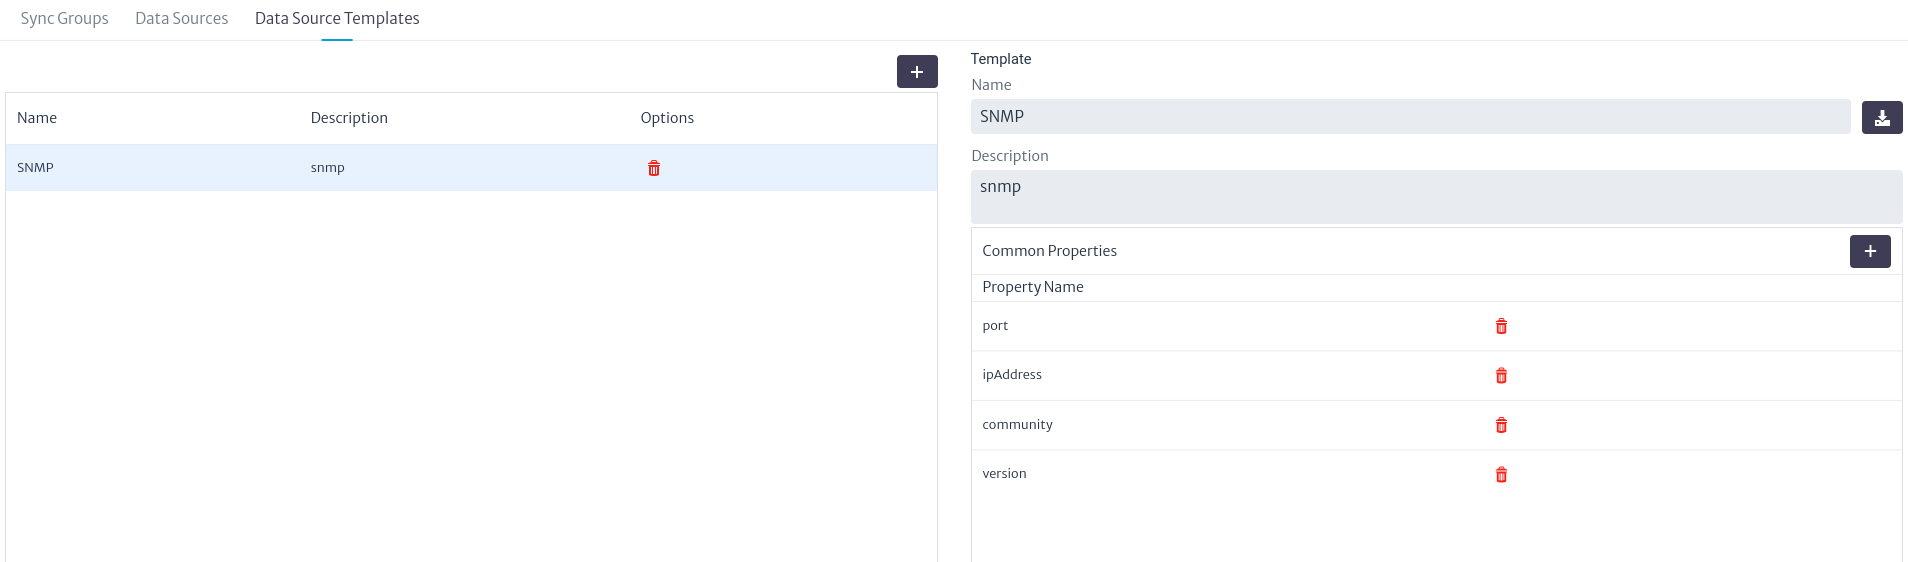
Figure 7. Update template.
Once you have defined your templates, you can proceed with the synchronization process by object group or by a particular object.
-
To define a synchronization process for a specific inventory object, locate and select the
Data Sourcesbutton. This will take you to the view shown in Figure 8, where you will find a table (initially empty) with the data sources created. The data sources contain the specific information to retrieve the data from a particular device.
Figure 8. Data sources. To create a new data source, click on the
button. Subsequently, a search bar will appear where you can find the inventory object by its name or by the class it belongs to.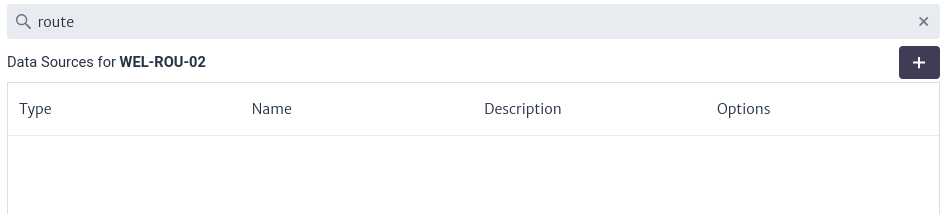
Figure 9. Data sources by object. After selecting an object, the data sources associated with that object will appear in the table mentioned above. Because the selected object has no data sources, the list appears empty. To add a new data source, select button the
again. On the right side of the screen, a form with the necessary information for its creation will appear. First, you must select an existing template. You can view the existing templates by clicking on  , which will display a list.
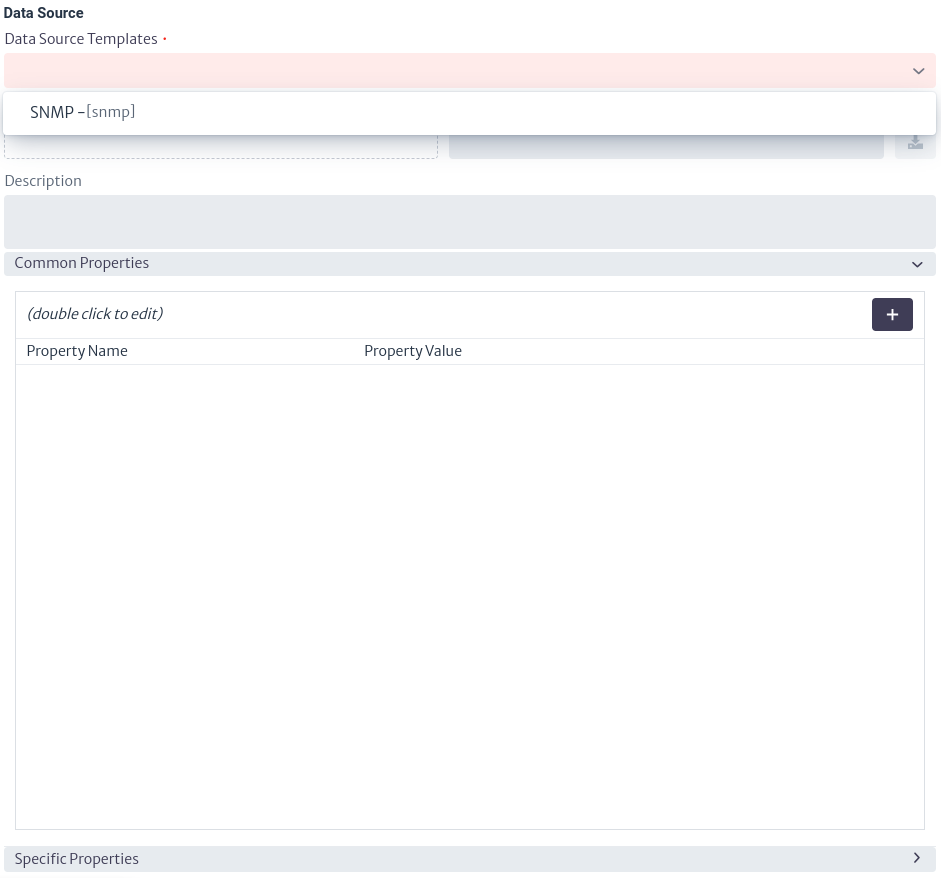
Figure 10. Select template. After selecting the template, the properties defined in it will be displayed. To assign a value to them, double click on the property and define the desired value. Then press the Enter key to set it.
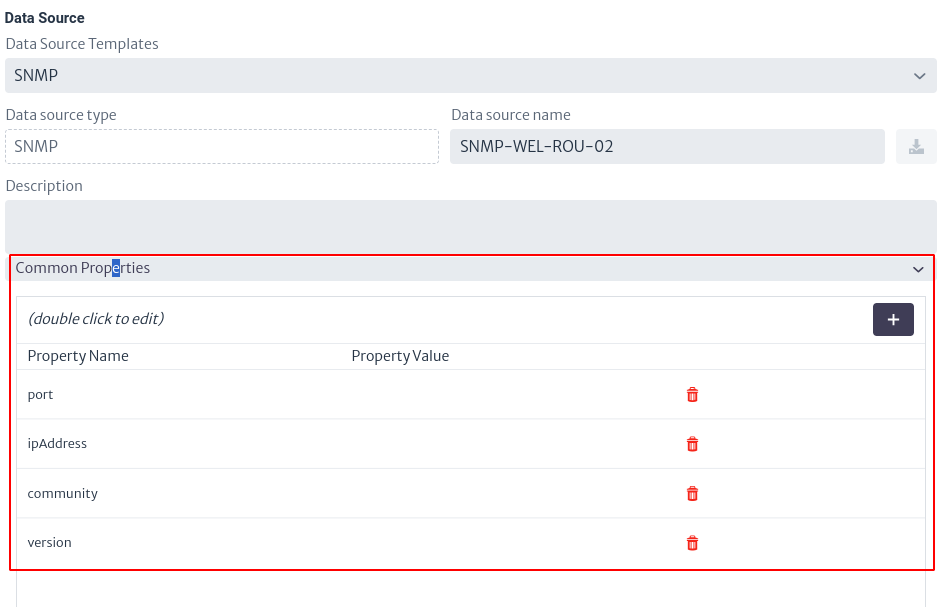
Figure 11. Configure common properties values. In addition, you can add specific properties for an object by selecting specific properties. Similar to creating properties in templates, select
to add them.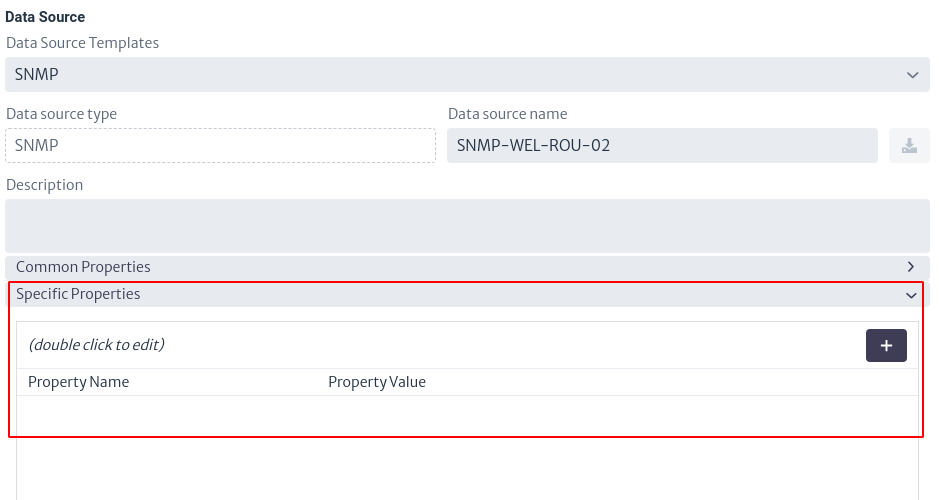
Figure 12. Configure specific properties values. Finally, to save the data source I selected
and the data source appears in the list mentioned in Figure 9.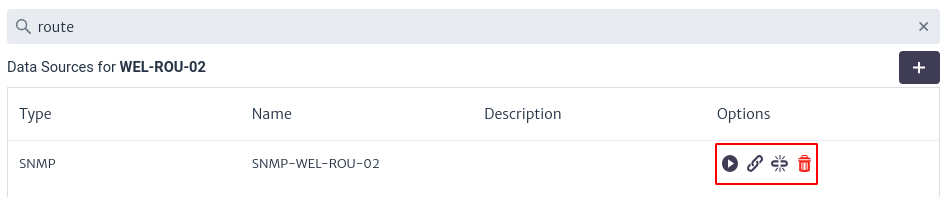
Figure 13. List of data sources. The table in Figure 13 has four columns.
- Type The type of data source (set by the template).
- Name The name of the data source.
- Description The description added to the data source.
- Options Different actions that can be performed for the data source. It has four options which are detailed below.
-
The icon
 executes the synchronization set for the selected object.
When this option is selected, a new window appears asking the user for the synchronization provider. As shown below.
executes the synchronization set for the selected object.
When this option is selected, a new window appears asking the user for the synchronization provider. As shown below.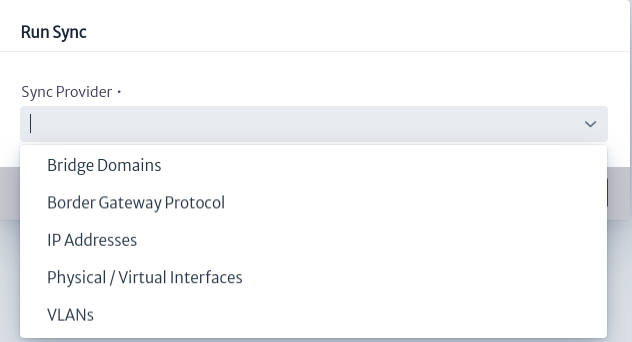
Figure 14. Select sync provider. The possible synchronization providers are listed in Figure 14: Bridge Domains, Border Gateway Protocol, IP Addresses, Physical/Virtual Interfaces and VLANs. In case you select the Border Gateway Protocol provider, you can modify the ASN (Autonomous System Number) by means of the configuration variable
sync.bgp.localAsn.Subsequently, the summary of the synchronization process performed appears, as illustrated in Figure 15.
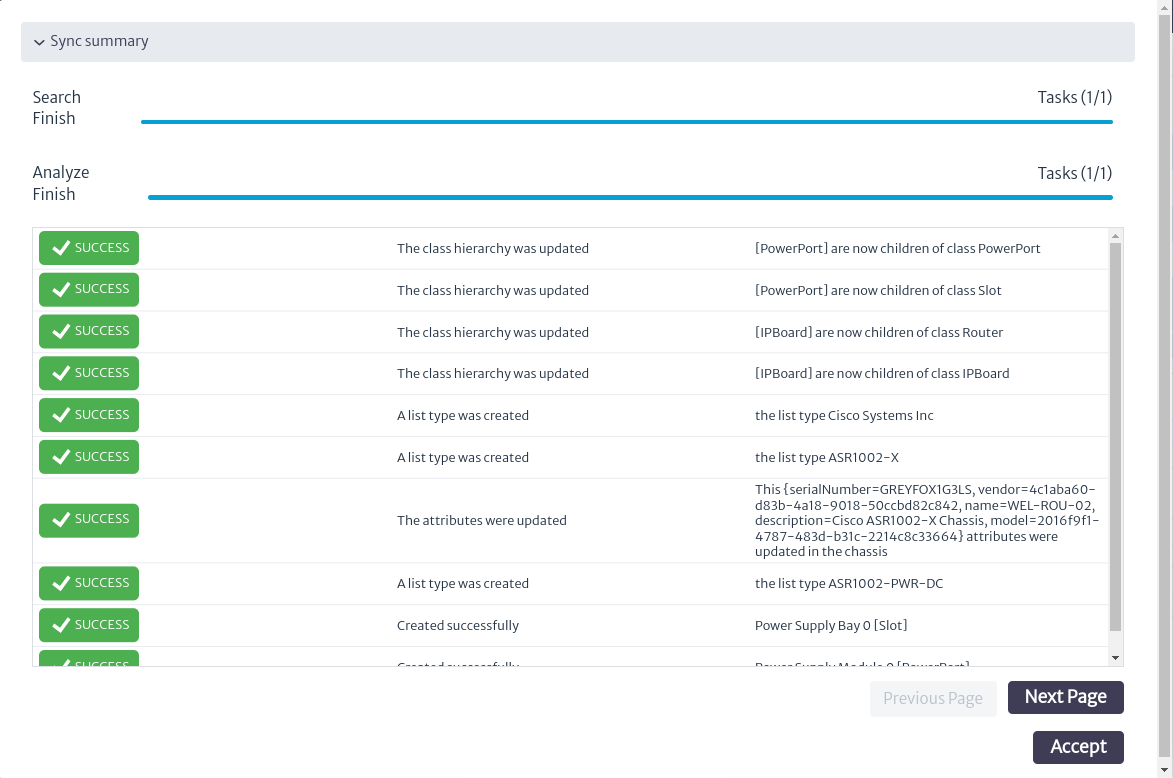
Figure 15. Execute data source. -
The icon
 allows you to add the data source to an existing synchronization group.
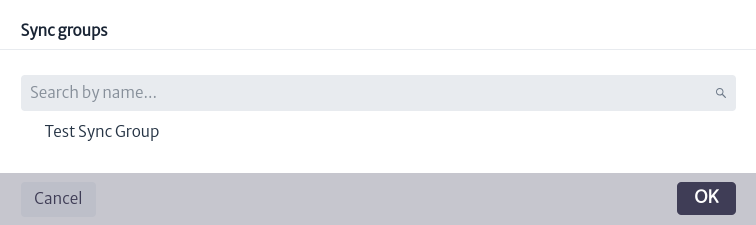
Figure 16. Add data source to group. -
The icon
 removes the data source from a synchronization group.
 -
The icon
removes the data source.
-
-
Synchronizations by group are managed in
Sync Groups, where you can search for the data sources of a previously created group or create a new synchronization group. Sync groups allow you to run a synchronization process for several inventory objects. For this, it is necessary to have data sources created, as explained above.
Figure 17. Synchronization groups. To create a new group select the
button, which opens a pop-up window like the one shown in Figure 18, where you can add the group name, a description and add data sources.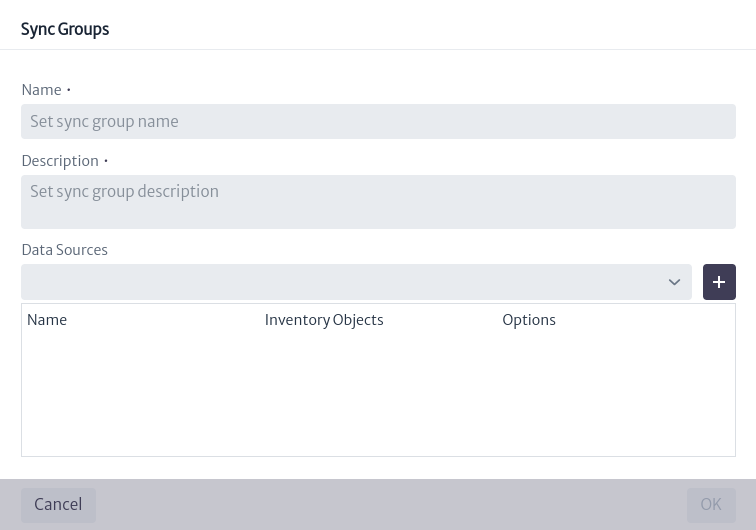
Figure 18. Create a synchronization group. To view the data sources associated with a group, use the search bar on the sync groups screen. You can search for the group of interest by typing the group name in the search bar or by selecting it from the drop-down list by clicking ![show_groups_icon]. When you select a group, the associated data sources will appear in the table in Figure 19. This table has four columns:

Figure 19. Data sources by group. - Name Name of data source.
- Description Description of the data source.
- Inventory Objects Inventory object associated with the data source.
- Options The actions that can be performed for each data source. It has only one option which is
 which removes the data source from the group.
To modify a group's information, select the icon
 , which will open the window shown in Figure 20. In this window, the user can modify the group name, description and associated data sources, adding or deleting them as needed.
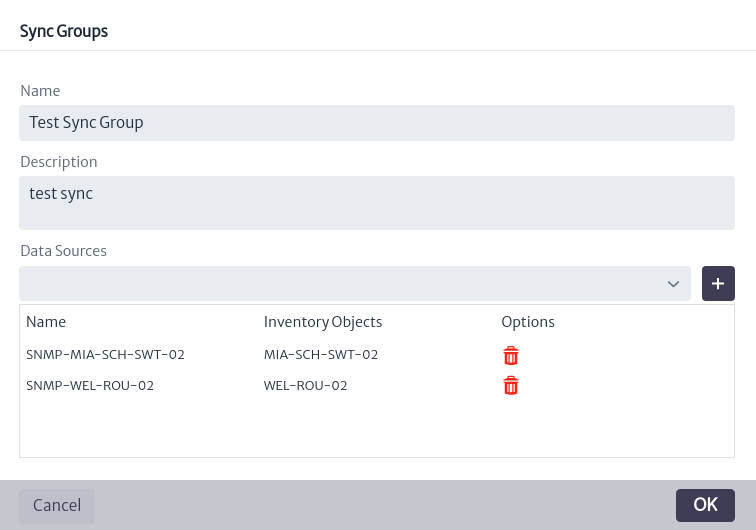
Figure 20. Update group. To delete a group, select the icon
 .
.Finally, you can execute the whole synchronization group by clicking on
which executes all the data sources associated to the group. In the same way as when running specific data sources, a window appears for the user to select the synchronization provider and at the end of the synchronization process, a summary of the results obtained is displayed.Figure 21. Select sync provider. 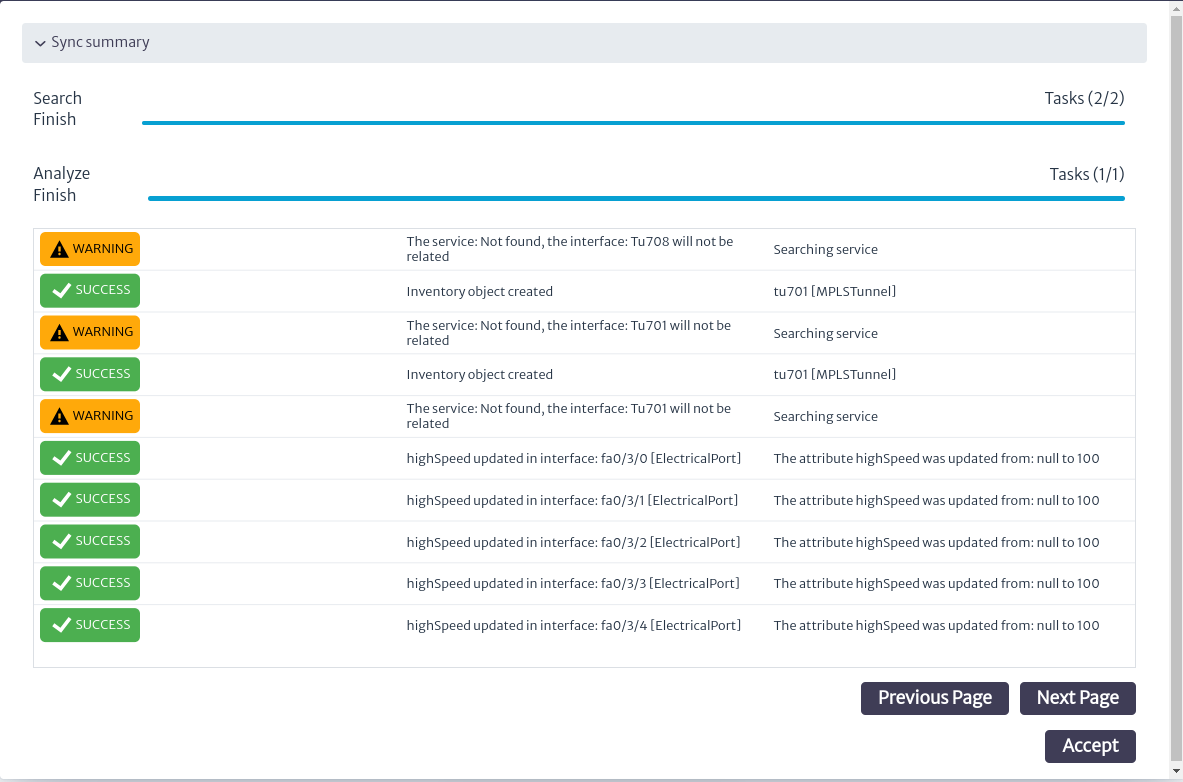
Figure 22. Execute sync group.
List of Parameters by Protocols
Currently, the synchronization module supports Simple Network Management Protocol (SNMP) and Secure Shell (SSH) protocols. The parameters that can be defined for the above protocols are shown below.
-
SNMP
Parameter Description ipAddress IP address of the system that will manage the SNMP devices. port Port for SNMP. version SNMP version. The possible values are: 2c,3. The default value is2c.community SNMP Version 2cattribute community. Default value public.authProtocol SNMP version 3attribute authentication protocol. Possible values:MD5,SHA.authPass SNMP version 3attribute authentication protocol pass phrase.securityLevel SNMP version 3attribute security level. Possible values:noAuthNoPriv,authNoPriv,authPriv.securityName SNMP version 3attribute security name.contextName SNMP version 3attribute context name.privacyProtocol SNMP version 3attribute privacy protocol. Possible values:DES,AES.privacyPass SNMP version 3attribute privacy protocol pass phrase. -
SSH
Parameter Description sshPort SSH port. sshUser Username used to log in to a remote server via SSH. sshPassword Password associated with the sshUser.
-
Synchronization Framework Overview: https://www.kuwaiba.org/docs/dev/sync/ ↩